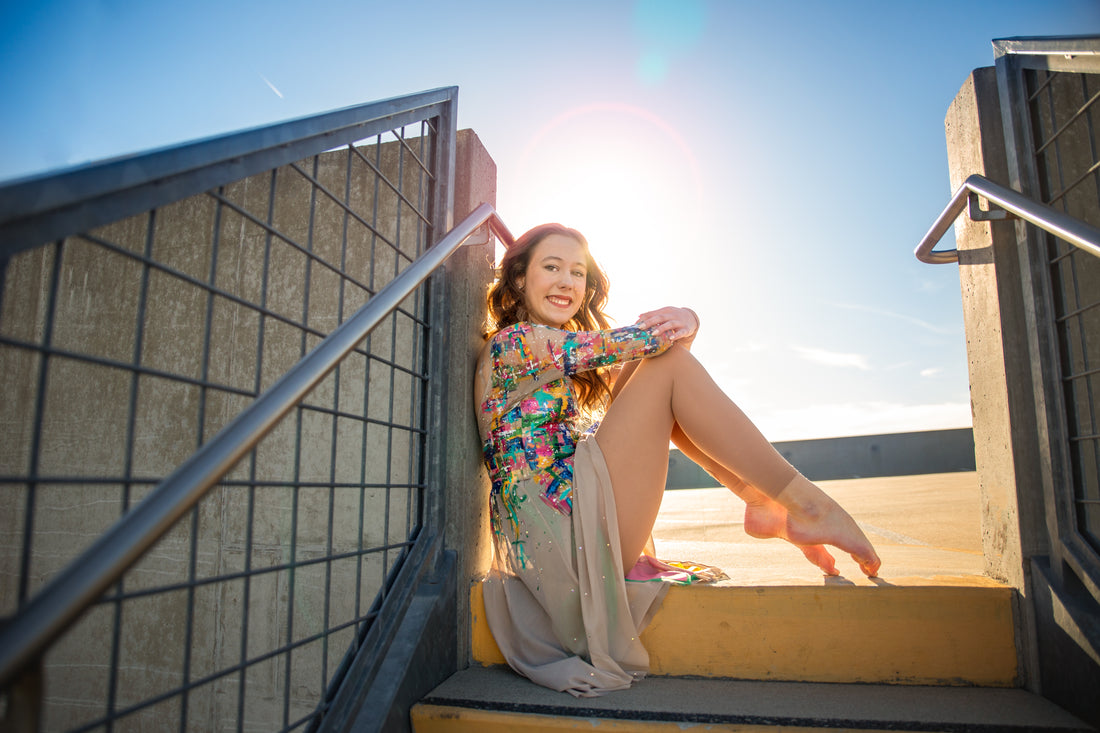
As predicted here when I first wrote about painting my daughter’s dance costume, it was an incredibly successful season. I even earned a costume award - which she (incorrectly) claims is hers.
Way more important than how she placed, she grew as a person and a dancer, and had a blast doing it. Trophies and medals mean nothing if growth and joy are missing.
I first wrote about painting her solo costume before the competition season started. Now, after she’s graced the stage in it almost ten times, I’m here to update the lessons I learned about painting on a dance costume. (Read the first round of lessons learned here.)
Acrylic paint is the right choice for a layered look.
The choreographer’s vision was to make the costume look like one of my paintings, so using the same paint I use on canvas made sense. I love Liquitex and Master’s Touch and used this metallic paint from Michael’s.
I experimented with fabric spray paint and liquid fabric paint, but they soaked into the costume and didn’t layer well. I did not consider oil paint for two reasons: 1) toxicity and 2) drying time.
I left the paint unsealed, which I would do again, but it did start to peel away from the fabric in a couple of places. Nothing intense and I didn’t have to fix it, but I would have reinforced those areas with some fabric glue if she had worn it more than she did.

Consider all angles.
I’m glad I didn’t skimp on the back because dancers are all over the stage and all angles need to be considered.
That said, I wish I had painted the entire mesh sleeve instead of skipping the underside where the sleeve met the body. I made the decision to leave that alone because I thought it would rub too much, but I see that blank space in pictures and in hindsight, wish I had continued the design in that space.

Bling makes all costumes better.
A tight timeline made finishing the costume for her first performance a “done beats better” situation. After that first competition I had some time to really study the video and make it better.
A pop of a bright viridian color and scattered rhinestones made all the difference. The choreographer had applied some, so I focused my efforts on filling in the “white space” that wasn’t painted.
I attach rhinestones and other costume embellishments with E600 Fabri-Fuse Glue and the end of a pen dipped in candle wax. (Fancy, I know.) There are tools made to grab the rhinestones, but I made my own last year and never looked back.

Painting on mesh is not fun.
If I ever paint on mesh again, I’ll try a very light coat of fabric spray paint first. I think the light base layer could help keep the fabric from moving so much when applying the acrylic paint.
A cardboard shirt form was great for stretching the body of the costume, but cardboard stuck to the paint under the mesh sleeves, trim and skirt. I recommend using silicone or hard plastic that won’t damage when removed.

Personal touches strengthen the connection between the dancer and her costume.
Each painting of mine starts with a prayer and meaningful words written on the canvas. My daughter’s costume was no different.
Creating a one-of-a-kind dance costume for a one-of-a-kind dancer was extremely personal to both of us. To make it completely hers, I added words of prayer and words that describe her character to the costume.
Once I had a good layer of paint down, I used an oil-based paint pen to write words of prayer to my daughter on the front. Those were covered with more paint to remain between God and me, but I decided to write words that describe her character on the back of the costume that remained visible. I wanted her to see those words to remember how uniquely amazing she is.


Final Thoughts
I don't have the words to describe how incredibly special it was to see my daughter dance her absolute heart out in a costume I poured all of mine into. I'm forever grateful for the opportunity to create this piece.


